Design My Own Living Room: Crafting Your Personal Sanctuary
The living room – it’s more than just a space; it’s the heart of your home. It’s where memories are made, stories are shared, laughter echoes, and quiet moments of reflection unfold. While countless design trends and professional services exist, there’s an unparalleled satisfaction in designing your own living room. It’s an intimate journey of self-expression, a chance to translate your personality, needs, and dreams into a tangible, comfortable, and utterly unique environment.
Embarking on this creative adventure can seem daunting, but with a structured approach and a dash of daring, you can transform a mere room into a sanctuary that truly resonates with you. This comprehensive guide will walk you through every step, from initial introspection to the final flourish, empowering you to design a living room that isn’t just beautiful, but perfectly yours.
Phase 1: The Foundation – Laying the Groundwork for Your Dream Space
Before you even think about paint swatches or sofa styles, a crucial period of introspection and planning is required. This phase is about understanding your needs, limitations, and aspirations.
1. Introspection is Key: What’s Your Living Room’s Purpose?
Begin by asking yourself fundamental questions about how you live and how you want to live in this space:
- Who uses this room? Is it primarily for you, a couple, a family with young children, teenagers, or pets?
- What activities will take place here? Entertaining large groups, intimate conversations, watching TV, reading, working, playing games, napping, hosting overnight guests?
- What feeling do you want to evoke? Cozy, grand, minimalist, vibrant, serene, sophisticated, eclectic?
- How much natural light does it receive? This will heavily influence color choices and furniture placement.
- What existing elements must you work with? Architectural features (fireplace, large windows), built-ins, flooring you can’t change.

Your answers will form the bedrock of your design decisions, guiding everything from furniture selection to color palettes.

2. Budgeting Brilliance: Setting Realistic Expectations
Designing your own living room doesn’t have to break the bank, but a clear budget is essential. Break it down into categories:
- Big-ticket items: Sofa, large rug, main lighting fixtures.
- Mid-range items: Armchairs, coffee table, media console, side tables.
- Accessories: Cushions, throws, art, plants, decorative objects.
- Finishes: Paint, wallpaper, flooring (if changing).
- Labor: If hiring help for painting, electrical, etc.

Be realistic, prioritize what’s most important to you, and don’t be afraid to mix high-end splurges with budget-friendly finds or DIY projects.
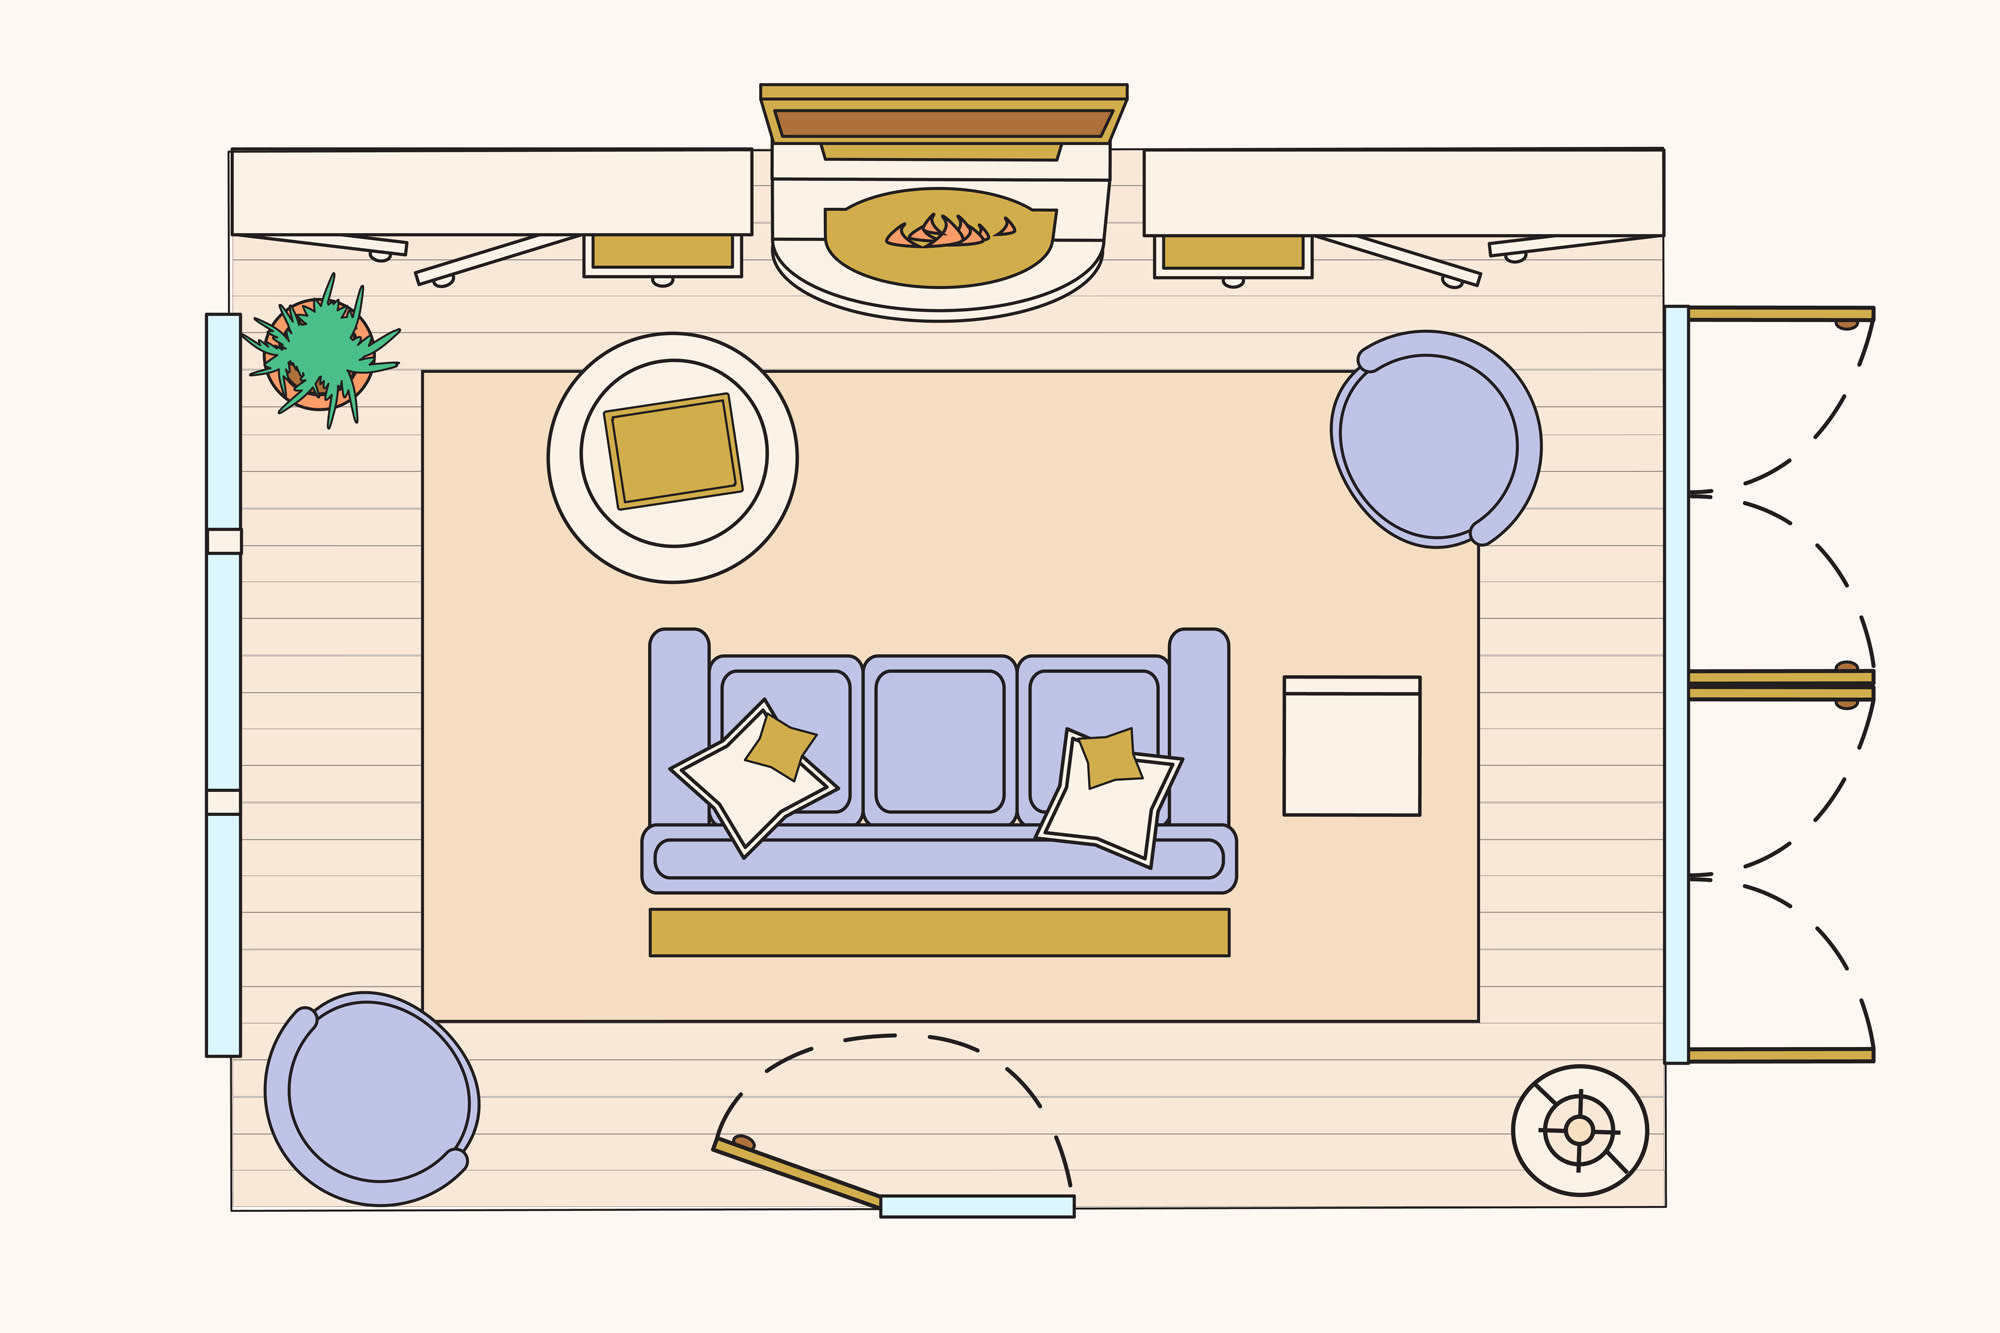
3. Measure Twice, Design Once: The Power of the Floor Plan
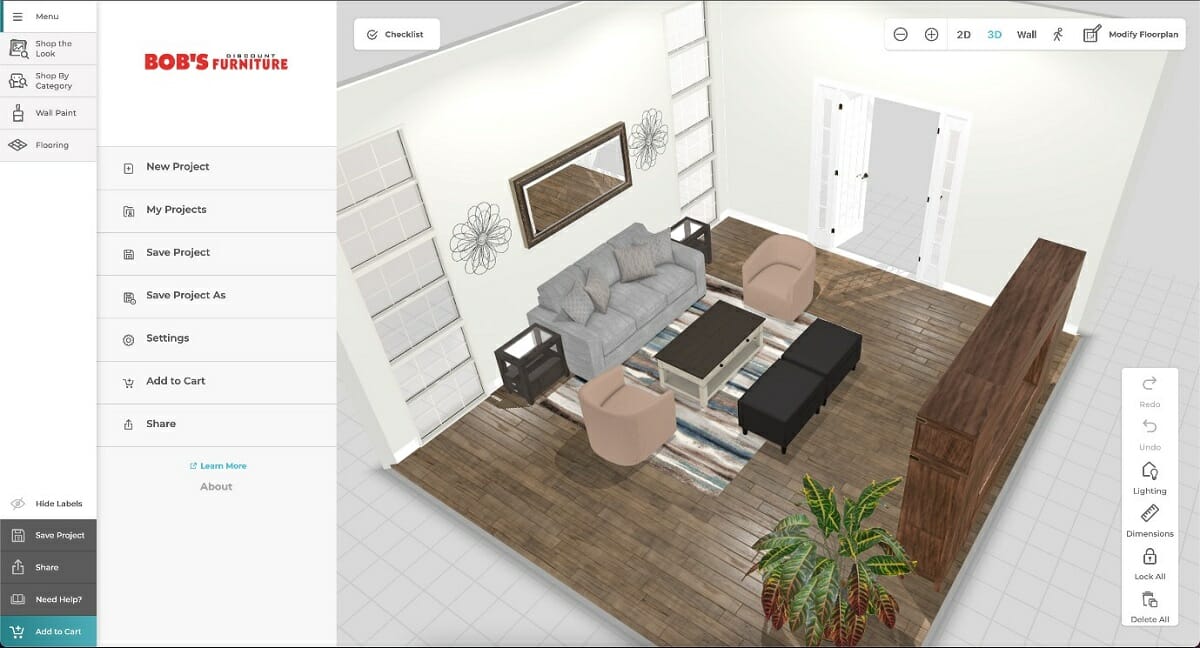
Grab a measuring tape, graph paper (or a digital floor planner), and meticulously map out your living room.
- Dimensions: Length, width, and height of the room.
- Architectural features: Windows (measure their height and width, and distance from floor/ceiling), doors, fireplaces, radiators, outlets.
- Traffic flow: Identify natural pathways through the room. You want to ensure furniture doesn’t obstruct these routes.
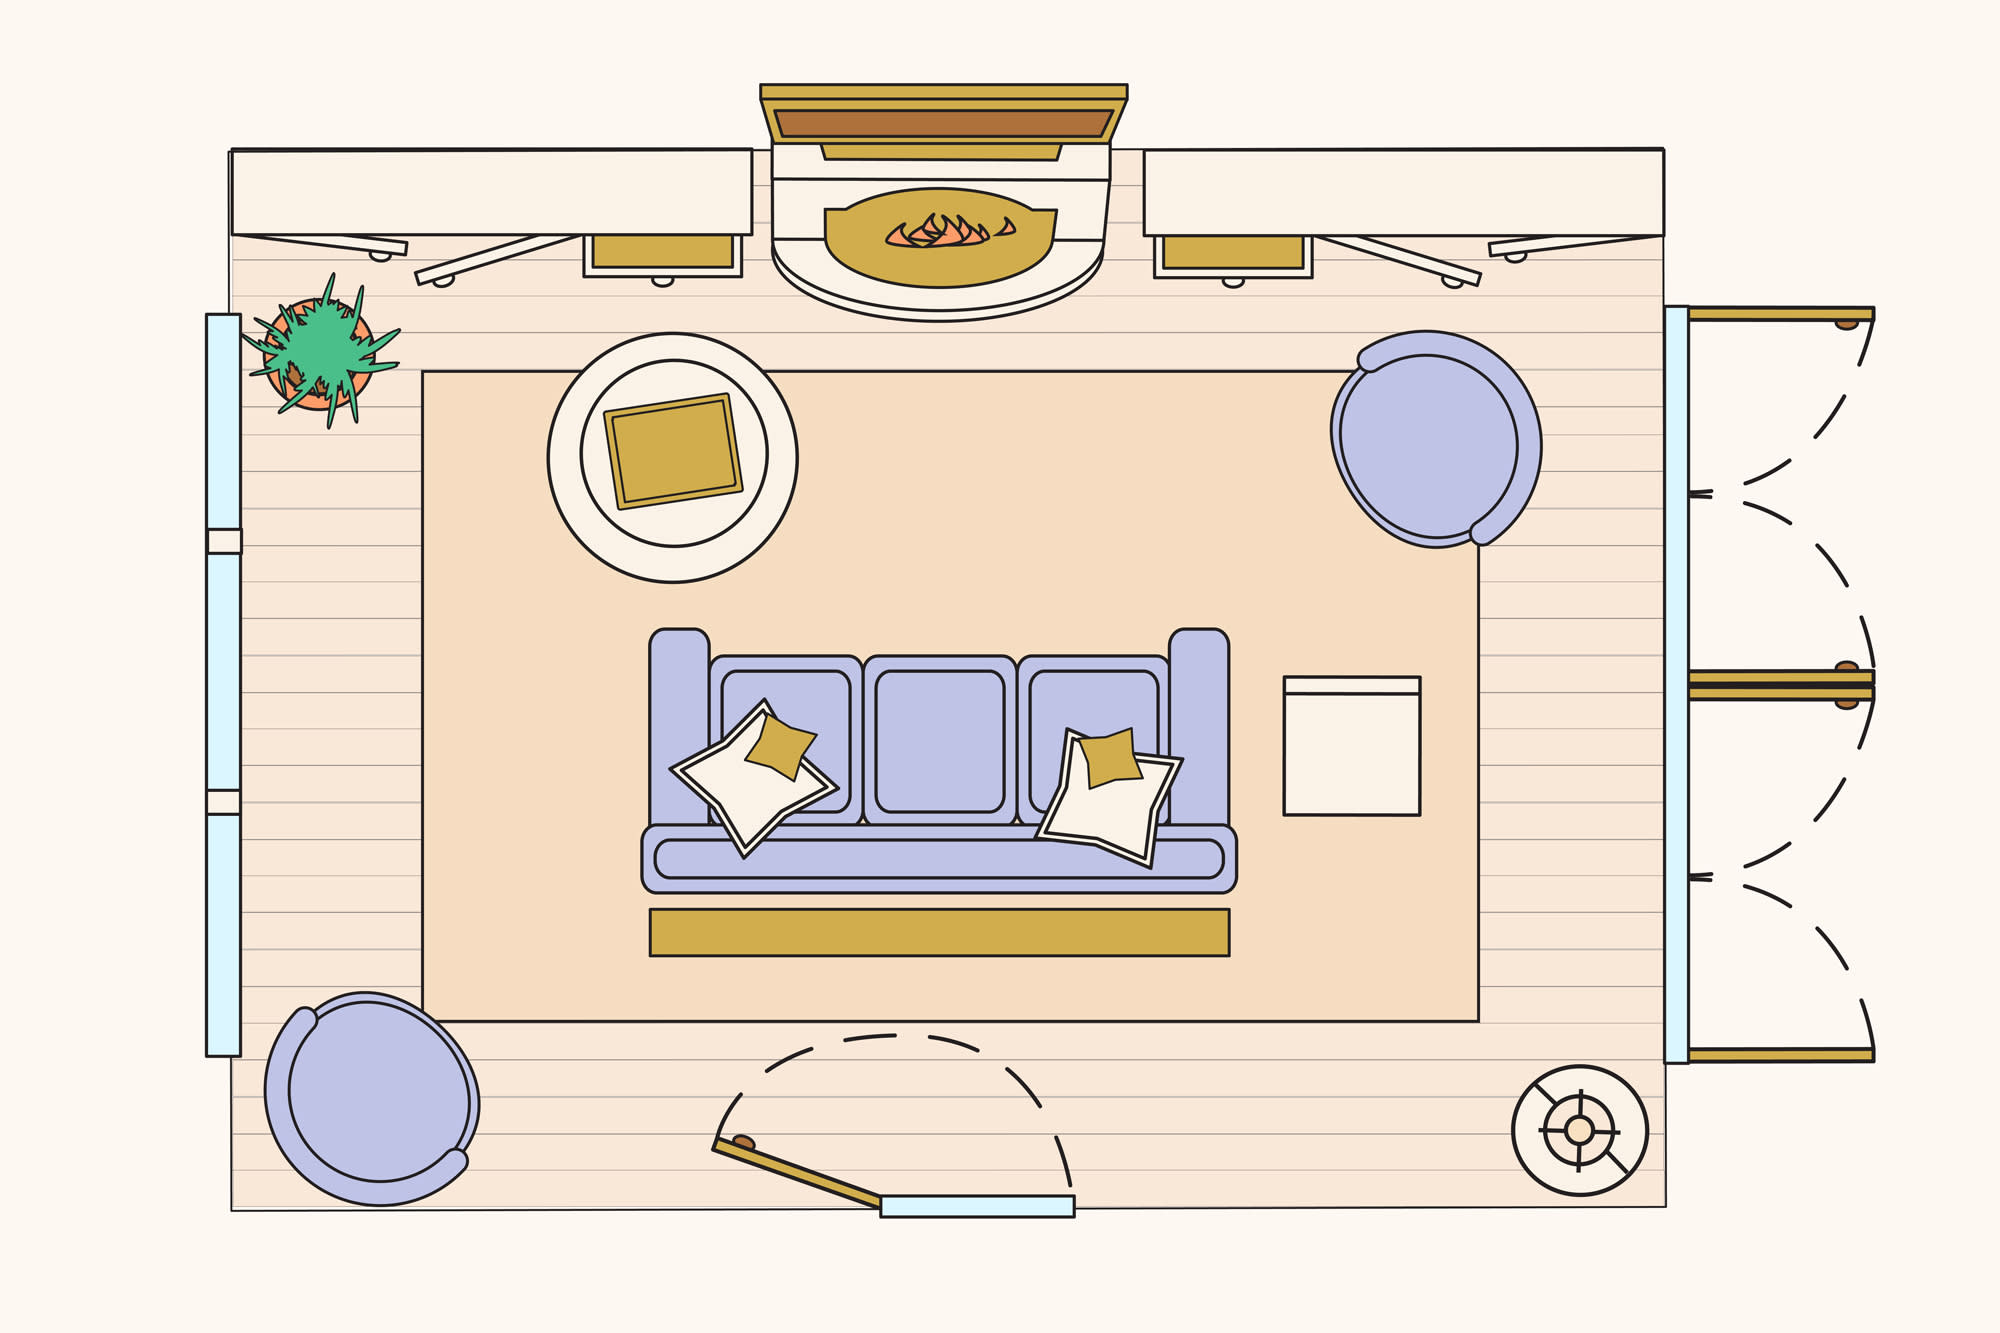
This detailed floor plan will be invaluable for furniture placement, ensuring everything fits comfortably and allows for easy movement. Consider drawing out potential furniture arrangements to visualize the space.
4. Inspiration Safari: Gathering Your Vision
Now for the fun part! Start collecting images that speak to you.
- Online: Pinterest, Instagram, Houzz, design blogs.
- Print: Interior design magazines, books.
- Real life: Pay attention to rooms you admire in friends’ homes, hotels, or cafes.
Don’t just save pretty pictures; analyze why you like them. Is it the color palette, the furniture style, the lighting, the overall mood? Create a mood board (physical or digital) that consolidates your inspirations. Look for recurring themes or elements that consistently catch your eye.
5. Defining Your Aesthetic: Pinpointing Your Style
Based on your inspiration, try to articulate your preferred design style. Are you drawn to:
- Modern: Clean lines, minimal clutter, functional.
- Bohemian: Eclectic, global influences, natural textures, relaxed.
- Traditional: Classic, elegant, rich materials, symmetrical.
- Industrial: Raw materials, exposed elements, utilitarian.
- Scandinavian: Light, airy, functional, natural wood, cozy textiles.
- Coastal: Breezy, natural light, blues and whites, natural textures.
- Eclectic: A thoughtful mix of styles, periods, and origins.
You don’t have to strictly adhere to one style; many beautiful rooms are a harmonious blend. The goal is to define a general direction.
Phase 2: The Canvas – Walls, Floors, and Light
With your plan in place, it’s time to address the foundational elements that define the room’s atmosphere.
1. The Floor Underfoot: Setting the Tone
Your flooring choice significantly impacts the room’s feel, acoustics, and durability.
- Hardwood: Timeless, warm, adds value, but can be pricey and prone to scratches.
- Laminate/Vinyl Plank: Cost-effective, durable, wide range of looks, good for high-traffic areas.
- Carpet: Soft, warm, sound-absorbing, but can stain and trap allergens.
- Tiles: Durable, cool, great for high-traffic or spill-prone areas, but can feel cold.
Consider your lifestyle and budget. If you have existing flooring you can’t change, think about how it integrates with your chosen style, or how a large area rug can mitigate its impact.
2. Walls: The Ultimate Backdrop
Walls are your largest surface area and offer immense potential for transformation.
- Paint: The most common and cost-effective option. Consider the psychology of color: blues and greens for calm, yellows and oranges for warmth and energy, neutrals for versatility. Always test paint samples on your wall in different lighting conditions throughout the day before committing.
- Wallpaper: Adds pattern, texture, and drama. Can be used on all walls or as an accent wall.
- Accent Walls: A single wall treated differently (bold paint, wallpaper, paneling, exposed brick) to create a focal point.
- Molding and Trim: Adds architectural interest and can elevate a plain room.
3. Illuminating Your Vision: Layered Lighting
Good lighting is paramount for both function and mood. Think in layers:
- Ambient (General) Lighting: Provides overall illumination (ceiling fixtures, recessed lights).
- Task Lighting: Focused light for specific activities (floor lamps for reading, desk lamps for working).
- Accent Lighting: Highlights features like artwork, architectural details, or plants (picture lights, spotlights, table lamps with directional shades).
Incorporate dimmers for flexibility, allowing you to adjust the mood from bright and functional to soft and intimate. Natural light is also a huge asset; plan your layout to maximize its benefits.
Phase 3: The Heart of the Room – Furniture and Layout
Now, the fun of populating your space begins. This is where your floor plan becomes your best friend.
1. Anchor Pieces: Sofa and Seating
The sofa is often the largest and most central piece in a living room.
- Size and Scale: Ensure it’s proportionate to the room. A massive sectional can overwhelm a small space, while a tiny sofa can look lost in a large one.
- Comfort and Durability: Test it out! Consider fabric choice based on lifestyle (e.g., performance fabrics for families/pets, velvet for luxury).
- Style: Does it align with your overall aesthetic?
- Arrangement: Consider a traditional sofa with two armchairs, a sectional, or two smaller sofas facing each other.
2. The Supporting Cast: Tables and Storage
- Coffee Table: Serves as a central hub. Consider its size (typically 2/3 the length of your sofa), height (should be similar to sofa seat height), and material.
- Side Tables: Essential for holding drinks, lamps, and remotes. Place one at the end of each sofa or armchair.
- Console Table: Great for behind a sofa, under a window, or along an empty wall for display or storage.
- Media Console/TV Unit: Choose one that accommodates your electronics and complements your style.
- Bookcases/Shelving: For displaying books, decor, or providing essential storage.
3. Layout Logic: Creating Flow and Zones
Your floor plan helps you create functional zones and ensure smooth traffic flow.
- Conversation Area: Arrange seating to encourage interaction, typically facing each other or around a focal point like a fireplace.
- Focal Point: Identify your room’s natural focal point (fireplace, large window, TV) and arrange furniture to highlight it. If there isn’t one, create one with a large piece of art or a statement furniture piece.
- Traffic Paths: Ensure clear, unobstructed paths (at least 30-36 inches wide) to doors and other areas of the room.
- Furniture Placement: Avoid pushing all furniture against the walls. Pulling pieces slightly away from walls, or floating a sofa in the middle of the room, can make the space feel larger and more inviting.
- Rugs as Anchors: Use a large area rug to define the main seating area and anchor all the furniture, ensuring at least the front legs of all seating are on the rug.
Phase 4: Adding Soul – Color, Texture, and Personality
This is where your living room truly comes alive, reflecting your unique taste and telling your story.
1. The Power of Color: Beyond the Walls
Your color palette extends beyond wall paint to furniture, textiles, and accessories.
- The 60-30-10 Rule: A helpful guideline: 60% dominant color (walls, large furniture), 30% secondary color (curtains, accent chairs, rugs), 10% accent color (cushions, art, decorative objects).
- Warm vs. Cool: Warm colors (reds, oranges, yellows) create a cozy, energetic feel; cool colors (blues, greens, purples) evoke calm and serenity.
- Neutrals: Don’t underestimate the power of neutrals (grays, beiges, whites). They provide a sophisticated backdrop that allows textures and accent colors to pop.
2. Textural Tapestry: Engaging the Senses
Layers of texture add depth, warmth, and visual interest.
- Rugs: Crucial for grounding the space, adding warmth, and defining zones. Consider wool, jute, sisal, or synthetic blends.
- Curtains/Drapes: Frame windows, control light, and add softness. Choose fabrics like linen, velvet, cotton, or sheer.
- Cushions and Throws: An easy way to introduce color, pattern, and texture. Mix sizes, shapes, and materials (knits, faux fur, silk, cotton).
- Furniture Materials: Leather, wood, metal, wicker – each adds a distinct texture.
3. Art and Accessories: The Storytellers
These are the personal touches that make a house a home.
- Art: Choose pieces that you love and that resonate with you. Size and placement are important; art should be proportionate to the wall and furniture below it (typically hung so the center is at eye level).
- Mirrors: Reflect light, make a room feel larger, and add sparkle.
- Decorative Objects: Vases, sculptures, collected items, books – these should be curated, not just clutter. Group items in odd numbers (rule of three) for visual appeal.
- Photographs: Display personal photos in cohesive frames to add warmth and a personal narrative.
4. Bringing in Life: Greenery
Plants add a vibrant, organic element, improve air quality, and bring a sense of tranquility. Choose plants appropriate for your room’s light conditions and your level of commitment.
Phase 5: The Finishing Touches and Living in Your Design
You’re almost there! These final steps ensure your room is both beautiful and functional.
1. Smart Storage Solutions: Taming Clutter
A beautiful room is a tidy room. Incorporate storage seamlessly:
- Ottomans with storage: Dual-purpose seating and hidden storage.
- Baskets: Perfect for throws, magazines, or kids’ toys.
- Built-ins: If budget allows, custom shelving or cabinetry can provide elegant storage.
- Furniture with storage: Coffee tables with drawers, media consoles with cupboards.
2. Window Treatments: Function Meets Style
Curtains, blinds, or shades are essential for privacy, light control, and adding a finished look.
- Drapery: Adds softness and can make windows appear larger if hung wide and high.
- Roman Blinds: A clean, tailored look.
- Sheer Curtains: For privacy while allowing light to filter through.
- Material and Length: Consider fabric weight and ensure curtains just kiss the floor or puddle slightly for a luxurious look.
3. Styling Surfaces: The Art of the Vignette
Arrange objects on coffee tables, side tables, and shelves thoughtfully.
- Trays: Use trays to corral smaller items and create a sense of order.
- Layering: Combine items of different heights, textures, and materials.
- Books: Stack them, display them, use them as risers for other objects.
- Personal Touches: Always include something that tells your story – a souvenir from a trip, a cherished family heirloom.
The Journey Continues: Living in Your Design
Once your living room is "complete," remember that design is an ongoing process. Live in your space for a while. Notice what works, what doesn’t, and what minor adjustments might enhance comfort or aesthetics. Rooms evolve as your life does, and that’s perfectly normal.
Designing your own living room is a deeply rewarding experience. It’s an opportunity to create a space that not only looks stunning but also functions flawlessly for your lifestyle, truly feeling like a reflection of you. So, take a deep breath, trust your instincts, and enjoy the incredible journey of crafting your personal sanctuary.
Design My Own Living Room: Crafting Your Personal Sanctuary | in opo wae, wis opo wae, and on last post i/admin have give some post/articles and many pictures gallery about " The Art of Living: Crafting Your Dream Living Room Design" if you have not seen it, please check out before seeing this. (just click text in "anchor text" to read or see last post first), I have packed all images collections become 1 gallery images on post and this time i just want to share again from my collections to could be useful :D. These pictures of Design My Own Living Room: Crafting Your Personal Sanctuary, I have collected in a fairly long time, and from various media such as the Internet, books, magazines, newspapers, comics, etc like as from search engine and other sources to be used as ideas for you. and these images has combined into one page on 0 Photos/images Gallery below. lets views.. o[^_^]o.Design My Own Living Room: Crafting Your Personal Sanctuary pictures collections gallery
Design My Own Living Room: Crafting Your Personal Sanctuary is a nice pictures and stock photo for your computer desktop or your smartphone device (ipad, tablet, blackberry, iphone, and other device) and also for your personal use. Free available for desktop wallpaper or additional image collections for your all needs. And was uploaded by admit at date August 1, 2025. You can download it in your computer by clicking download button to save image... have nice day and have fun guys..
This 1 image in featured post from 0 Photos/images Gallery and awesome picture selections about Design My Own Living Room: Crafting Your Personal Sanctuary is available to download. "Download & Save" images/pictures/wallpapers now and this Is one of the post that listed in packed to Category is Living Room Design Ideas directory, with image dimension/resolution size is 2000 × 1333 px and size image/picture file is 175 KB with original link post ID is : https://powae.pw/design-my-own-living-room-crafting-your-personal-sanctuary/. Get download/save images in post and gallery, "download" images or "preview" it on a bigger image for spesification sample in Large size (full attachment size) here : [Download & View to Large size]. Just Simple way, in thumbnail or in Gallery. *Click images to view Large Size.We collect this wonderful image from online and choose one of the best for you. Pictures collection that posted here was carefully chosen and published by author after choosing the ones which are best among the others. So, ultimately we make it and here these list of best image for your inspiration and informational reason regarding the Design My Own Living Room: Crafting Your Personal Sanctuary as part of blogsite exclusive updates collection. So, take your time and find the best informations and pictures posted here that suitable with your needs and use it for your own collection and personal use. About Image information: Image has been submitted and You are able to give your opinion as evaluations to our web site value.
Don't forget to comment if you interest with this images, you can share this post to social media like as facebook, twitter, google+, pinterest, stumbleupon, and more. just click social media buttons for share this post Design My Own Living Room: Crafting Your Personal Sanctuary Now. :)
Thanks for your visit, I hope you happy come to opo wae, wis opo wae, and get what you're looking for. And hope sometimes you will come back again here. All you need to do is help us develop by discussing this Design My Own Living Room: Crafting Your Personal Sanctuary if you like it "leave your comment". have fun, Thank you.


